
You can use a compatible Xbox controller with Flock XR on an iPhone. Connect your controller to your iPhone using Bluetooth or a wired connection, then open Flock XR in your browser.
Using a controller can make Flock XR projects feel more like traditional 3D games and gives players another way to move around and interact with your worlds.
What you need
You will need:
- an iPhone
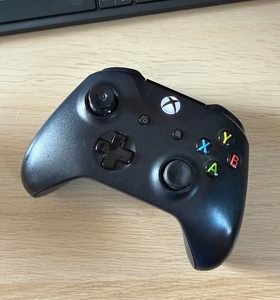
- a compatible Xbox controller
- Bluetooth or a suitable cable
- a iPhone cable adapter, if required
- a web browser
- a Flock XR project that uses player controls
Connect your Xbox controller to your iPhone using Bluetooth
First, put your Xbox controller into pairing mode.
- Turn on your Xbox controller.
- Press and hold the controller’s pairing button until the Xbox button starts flashing.
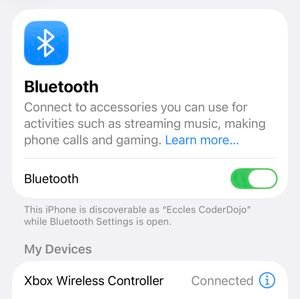
- On your iPhone, open System Settings.
- Select Bluetooth.
- Find your Xbox controller in the list of nearby devices.
- Select Connect.
When the controller has connected, the Xbox button should stop flashing.
Connect an Xbox controller using a cable
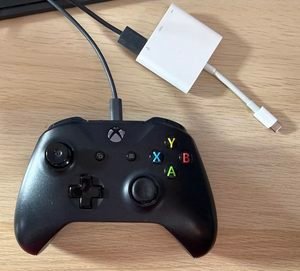
You can also connect a compatible Xbox controller directly to your iPhone using a cable, you may also need an adapter.
Once connected, your iPhone should recognise the controller automatically.
Test your Xbox controller with Flock XR
Once your controller is connected to your iPhone:
- Open app.flockxr.com in your browser.
- Open a project that uses player controls. (such as the ‘My Place’ demo project)
- Press Play.
- Try the controller to move or interact with your project.
Using your Xbox controller for player movement in Flock XR
You can use the controller’s sticks to move around your project.
How the left stick works depends on the movement controls that have been defined in your Flock XR project.
If your project only uses forward and backward movement:
- Move the left stick up or down to move forward or backward.
- Move the right stick left or right to pan the camera and change the direction you are facing.
This creates controls similar to many 3D games: use the left stick to move and the right stick to look around.
If your project defines forward, backward, left and right movement:
The left stick controls movement in all four directions. You can use it to move forward, backward, left and right.
The right stick can still be used to pan the camera.
Coding your Xbox controller button controls in Flock XR
The Xbox controller’s lettered buttons correspond to Flock XR’s numbered controller buttons:
| Xbox button | Flock XR control |
|---|---|
| B | Button 1 |
| Y | Button 2 |
| X | Button 3 |
| A | Button 4 |
What these buttons actually do is up to the person creating the Flock XR project.
For example, you could program Button 4 (A) to make a character jump, Button 1 (B) to interact with a character, or another button to play a sound.
This means there isn’t one fixed action for each Xbox button. You assign the actions you want the buttons to perform when you create your project.
Cross-device compatibility
You can build your project’s controls using Flock XR’s movement and controller defaults rather than designing your project around a particular Xbox button.
For example, if your project responds to Button 4, a player using an Xbox controller can trigger that action by pressing A.
This makes it easier to design projects that can be played using different input methods and controllers.
Troubleshooting
FAQs
Next steps
Now that your Xbox controller is connected, try using it in a Flock XR project with character movement.
You can also explore different ways of controlling characters and interactions to make your Flock XR project easier and more enjoyable to play.