Instructions designed for Release 2 of Flock XR coming Spring 2027
Mac users use ⌘ instead of Ctrl
Get started
Open Flock XR and Create a New Project To create a new project hold Ctrl + B then press 1 to access the burger menu then press Enter, →, Enter and a blank project will open.
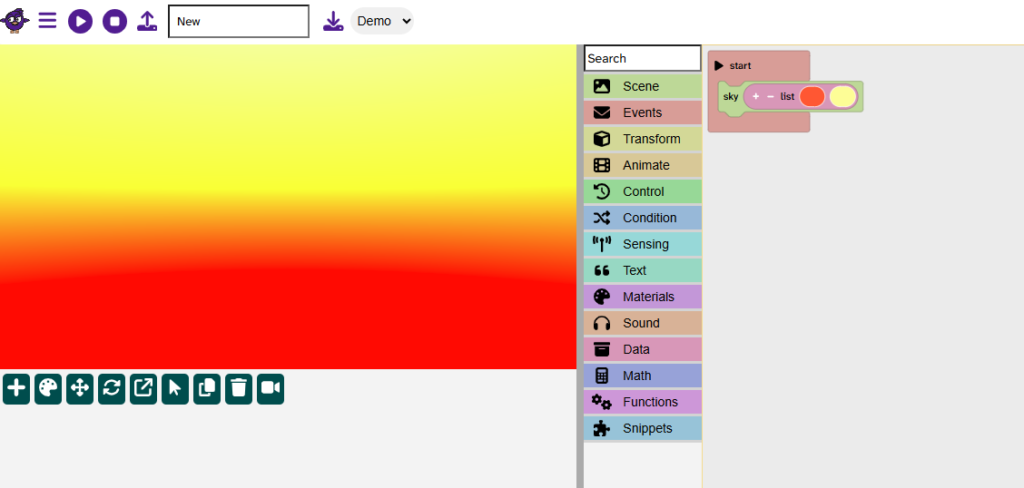
Add the sky
Press Tthen type Ev to get to Events
Press → to select start and then Enter, Enter to place start in the code area
Press T then S to access the Scene menu, then press → to highlight the sky block then Enter to place it in the code area.
Use ↑, ↓, ←, and → to place the block inside start if needed.
Press Enter to confirm position.
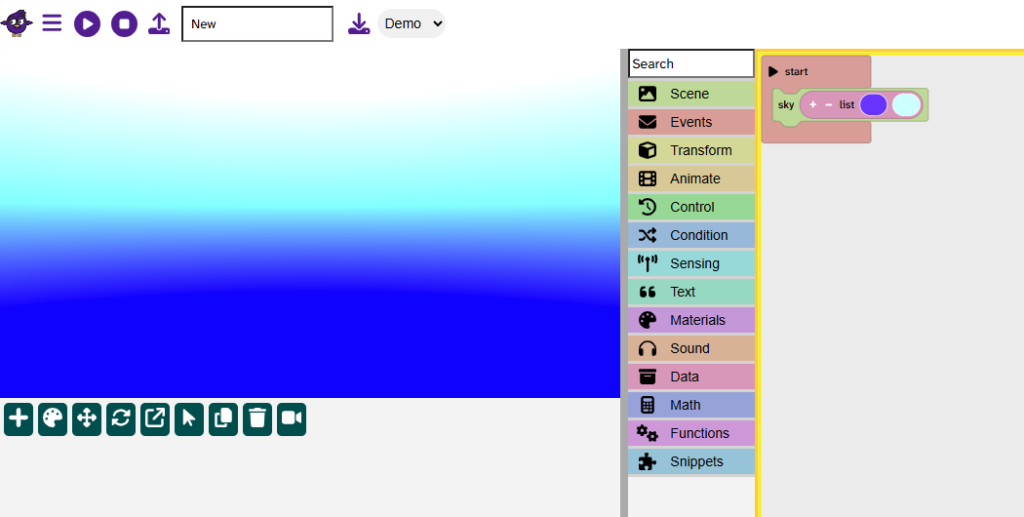
Add a gradient sky
Press T, M, → to access Materials
Press ↓ until you reach the list of colours block
Press Enter to place the block in the code area.
Use ↑, ↓, ←, and → as needed to place the block inside the sky block.
Press Enter to confirm.
Press → until you reach the first colour block
Press Enter to access the colour options and use ↑, ↓, ←, and → to select a colour
Press Enter to confirm your colour choice
Press → to access the second colour and repeat steps to choose your second colour
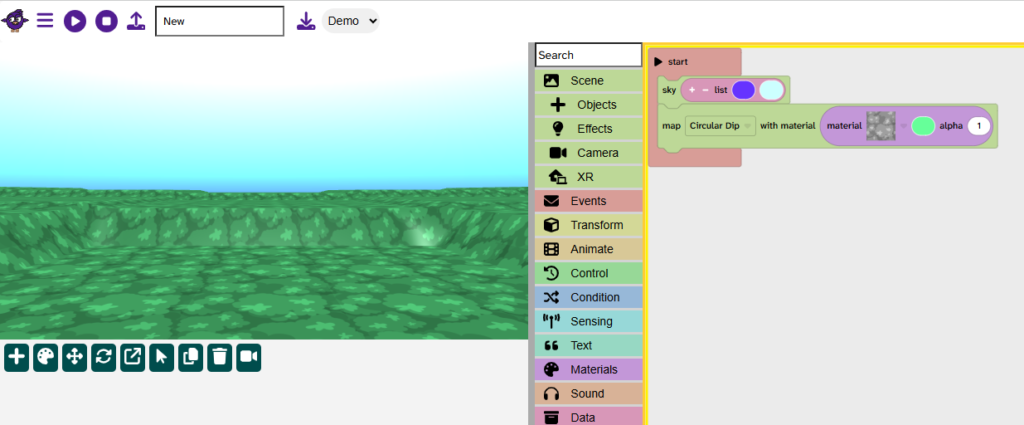
Add a map
Press T then S to access the Scene menu and then press →, ↓ and Enter to add the block to the code area.
Use ↑, ↓, ←, and → to place the block under the sky block as needed.
Press Enter to confirm.
Press → to reach the map options [Flat] and press Enter to open the menu
Press ↓ to choose a map, press Enter to confirm
Press → twice to get to the material options and press Enter to open the menu
Use ↑, ↓, ←, and → to select a material, press Enter to confirm
Press → to get to the colour block and Enter to open the menu
Choose a colour and press Enter to confirm
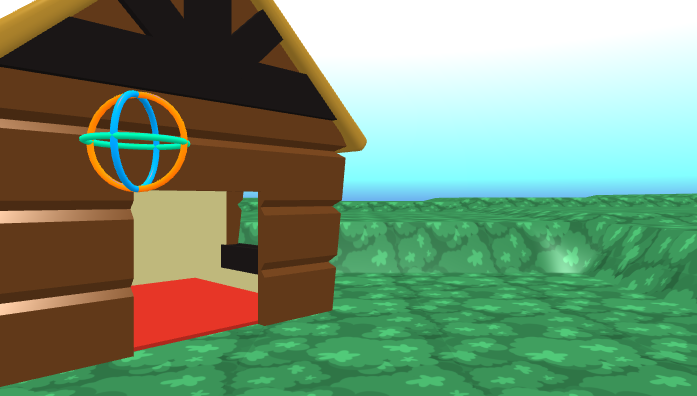
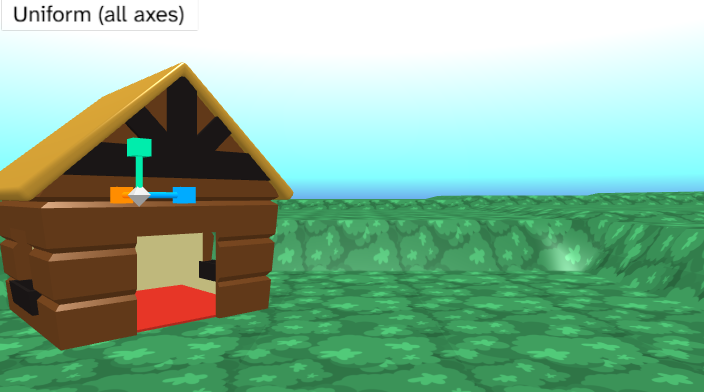
Add a house
To access the gizmos hold Ctrl + G
Press 1 to access the + menu
Use ↑, ↓, ←, and → to choose a house.
Press Enter to confirm.
Press ↑ to move your cursor to the canvas
Use ↑, ↓, ←, and → to move the cursor to the bottom left of the screen to place the house.
Press Enter to confirm.
Press 4 on the gizmo menu to access rotate.
Press Y to access the y axis rotation.
Use ← and → to change the rotation of the house until done.
Press 5 on the gizmo menu to access scale.
Press U to use uniform scale (even scaling).
Press PgUp and PgDn to scale up or down.
Tip: Hold shift as well to make smaller changes.
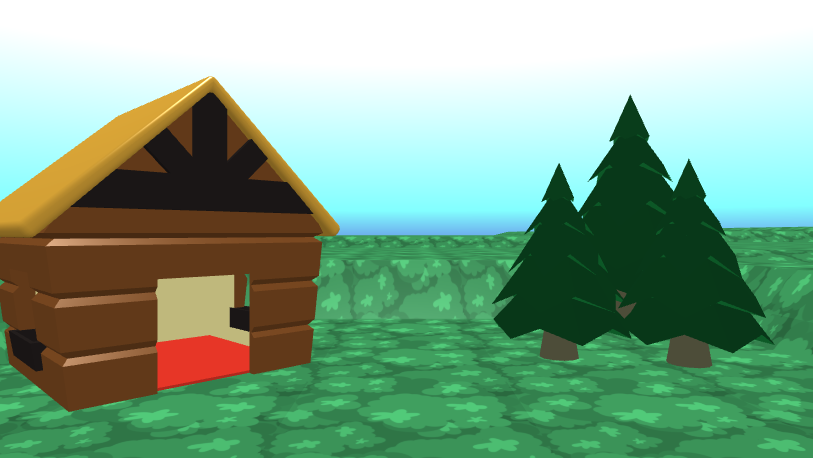
Add trees
To access the gizmos hold Ctrl + G
Press 1 to access the + menu
Use ↑, ↓, ←, and → to choose a tree.
Press Enter to confirm.
Press ↑ to move your cursor to the canvas
Use ↑, ↓, ←, and → to move the cursor to the right of the screen to place the tree.
Press Enter to confirm.
Rotate, position and scale as needed.
Repeat for two more trees.
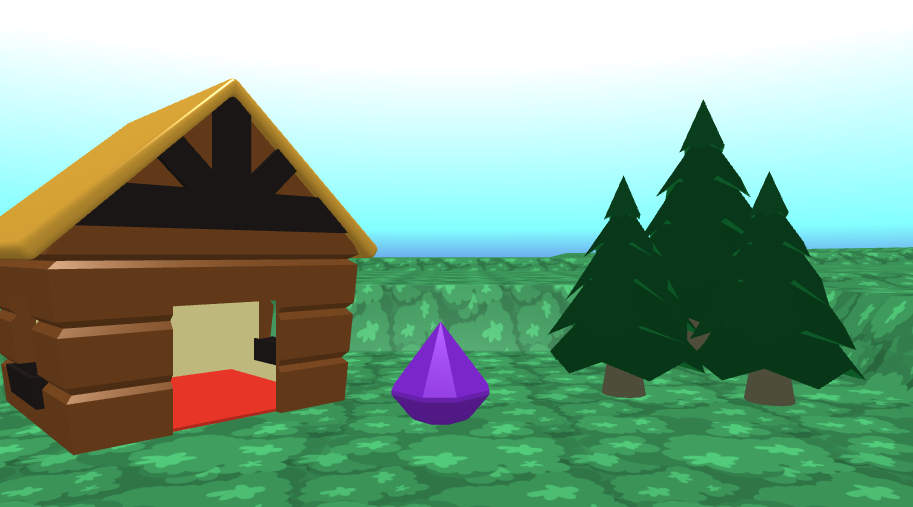
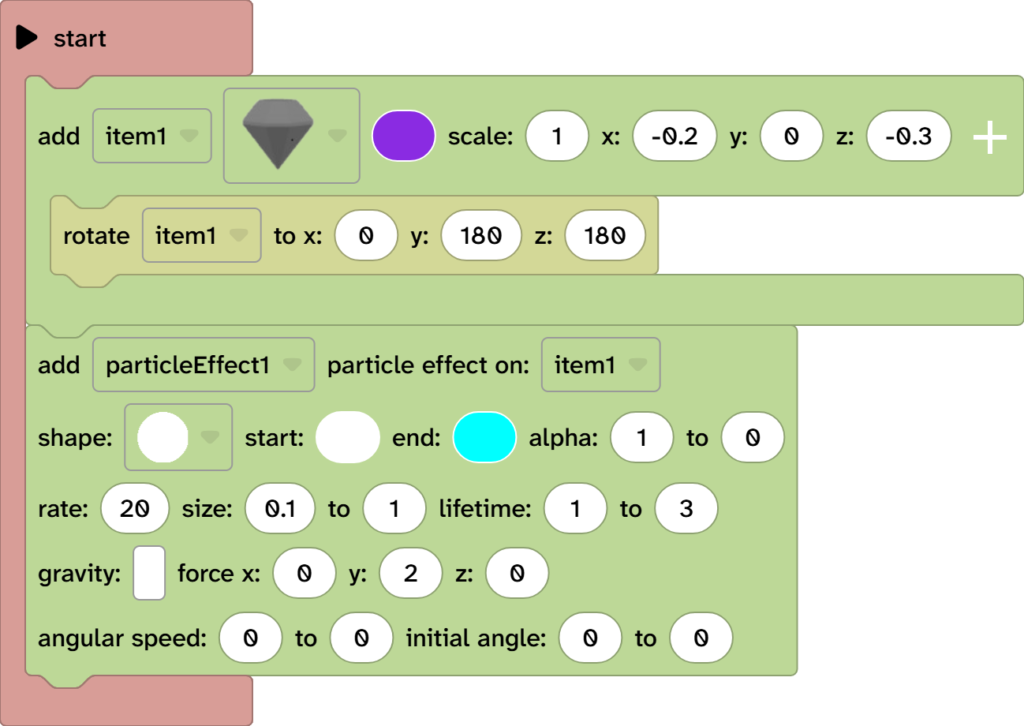
Add a gem for a fire
To access the gizmos hold Ctrl + G
Press 1 to access the + menu
Use ↑, ↓, ←, and → to choose the gem object.
Press Enter to confirm.
Press ↑ to move your cursor to the canvas
Use ↑, ↓, ←, and → to move the cursor to the bottom centre of the scene.
Press Enter to confirm.
Rotate the gem upside down.
Reminder: Press 4 to access the gizmo menu. Select the gem using ↑, ↓, ←, and →, press X to rotate on the X axis, use ↑, ↓ to rotate.
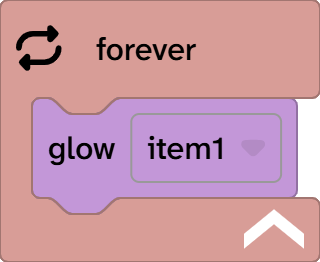
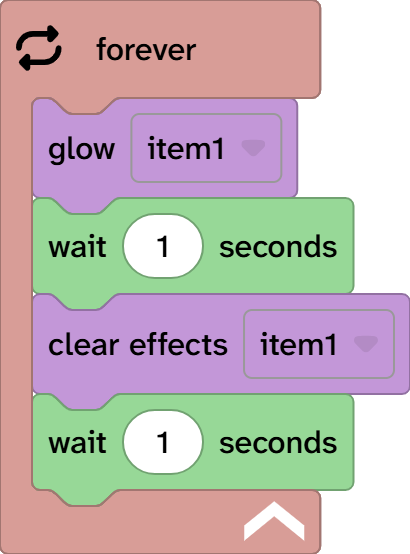
Make the fire flicker
Press T to access the toolbox and navigate to Events using ↑and ↓.
Use → and ↓ to access the forever block.
Press Enter to confirm.
Use ↑, ↓, ←, and → to place the forever block in the code area.
From the toolbox find Materials and add the glow block inside the new forever block.
[Note: Make sure it is set to item1 or whatever name is used for your gem fire]
From the toolbox find Control and add the wait block under the glow block
From the toolbox find Materials and add the clear effects block under the wait block
From the toolbox find Control and add the wait block under the clear effects block
Press P to play and test your fire
Add a particle effect
From the toolbox go to Scene and choose effects then find the particle effect block
Add the particle effect block under the code that adds the gem to the scene
Use the → on the particle effect block to navigate to the y: value.
Change 2 to –2.
Press P to play and test.
Continue the ambient scene
Continue to add more items to the scene to improve it’s appearance
You could:
➡️ Add a character and make it do an ‘Idle’ animation by the fire ➡️ Add more objects to your scene ➡️ Make a rain particle effect fall from the sky ➡️ Or something else!