Instructions designed for Release 2 of Flock XR coming Spring 2027
Mac users use ⌘ instead of Ctrl
Get started
Open Flock XR and Create a New Project
To create a new project hold Ctrl + B then press 1 to access the burger menu then press Enter, →, Enter and a blank project will open.
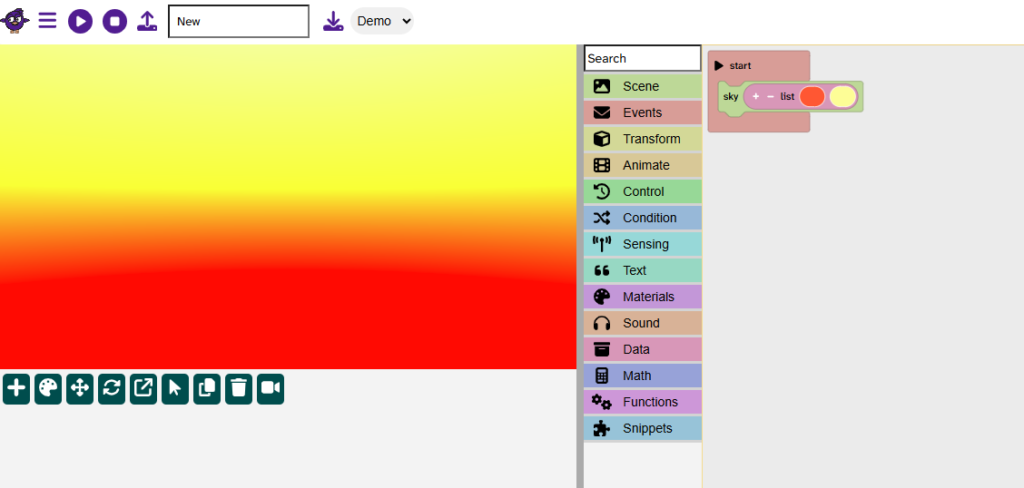
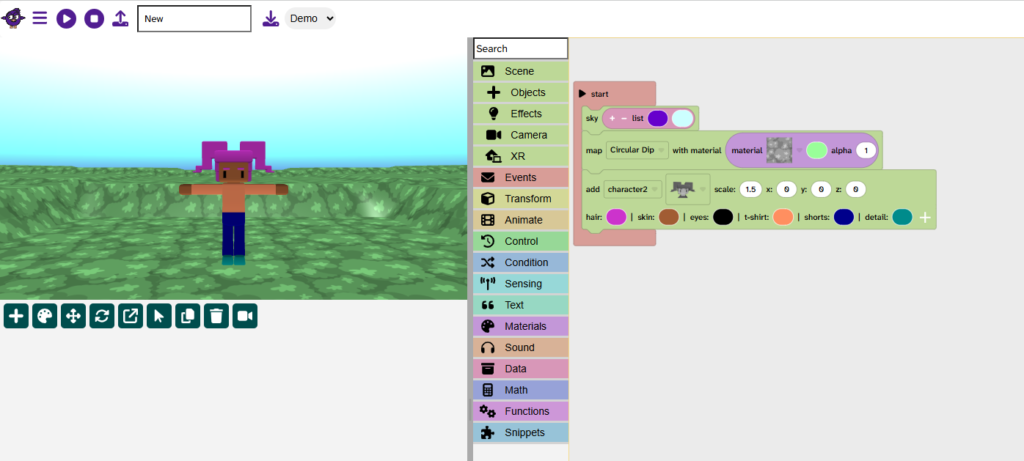
Add the sky
Press T then type Ev to get to Events
Press → to select start and then Enter, Enter to place start in the code area
Press T then S to access the Scene menu, then press → to highlight the sky block then Enter to place it in the code area.
Use ↑, ↓, ←, and → to place the block inside start if needed.
Press Enter to confirm position.

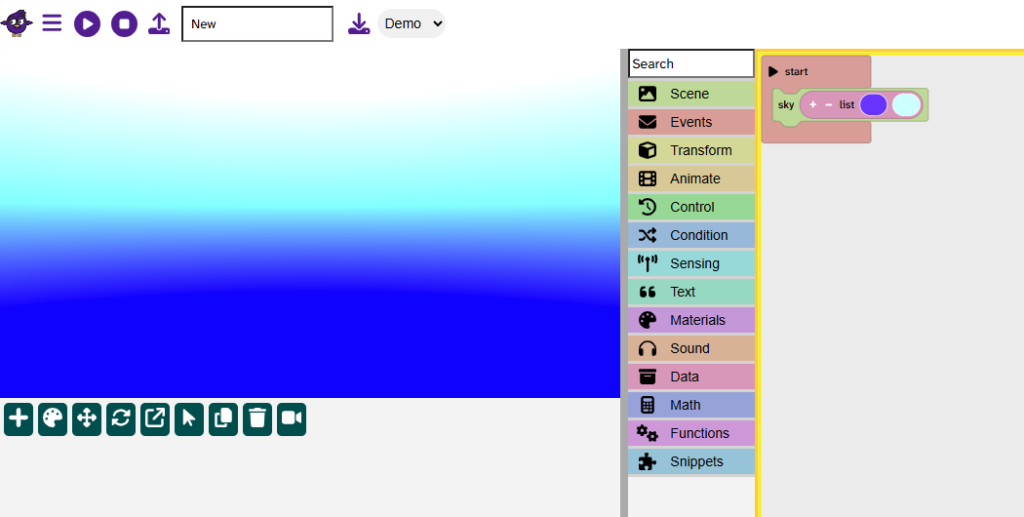
Add a gradient sky
Press T, M, → to access Materials
Press ↓ until you reach the list of colours block
Press Enter to place the block in the code area.
Use ↑, ↓, ←, and → as needed to place the block inside the sky block.
Press Enter to confirm.
Press → until you reach the first colour block
Press Enter to access the colour options and use ↑, ↓, ←, and → to select a colour
Press Enter to confirm your colour choice
Press → to access the second colour and repeat steps to choose your second colour
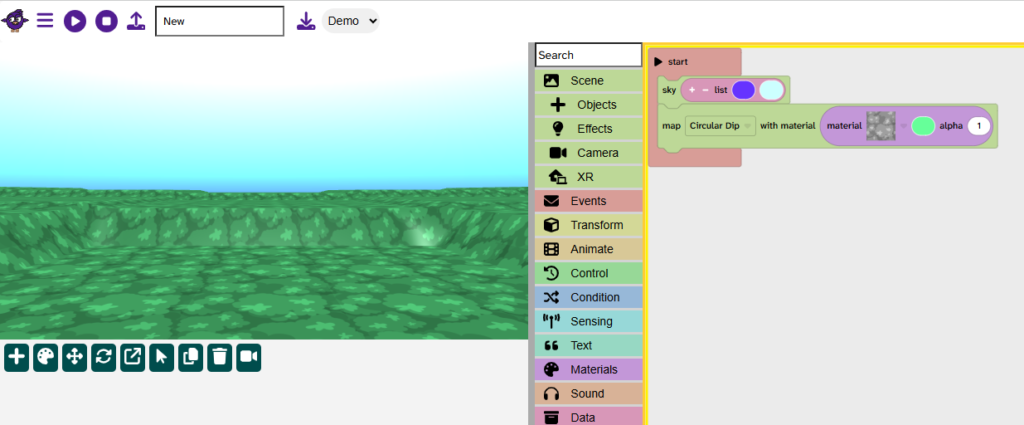
Add a map
Press T then S to access the Scene menu and then press →, ↓ and Enter to add the block to the code area.
Use ↑, ↓, ←, and → to place the block under the sky block as needed.
Press Enter to confirm.
Press → to reach the map options [Flat] and press Enter to open the menu
Press ↓ to choose a map, press Enter to confirm
Press → twice to get to the material options and press Enter to open the menu
Use ↑, ↓, ←, and → to select a material, press Enter to confirm
Press → to get to the colour block and Enter to open the menu
Choose a colour and press Enter to confirm
Add a character
Press T then S then use the ↓ to get to objects
Press → and ↓ to reach the add character block.
Press Enter to add to the code area. Use ↑, ↓, ←, and → to place the block under the map block.
Press Enter to confirm.
Press → to reach the character menu and press Enter to open
Choose a character using ↑, ↓, ←, and → and press Enter to confirm
Press → to access the scale and change the scale to 1.5, press Enter to confirm.
Keep pressing → to access the character colours and choose colours for your character
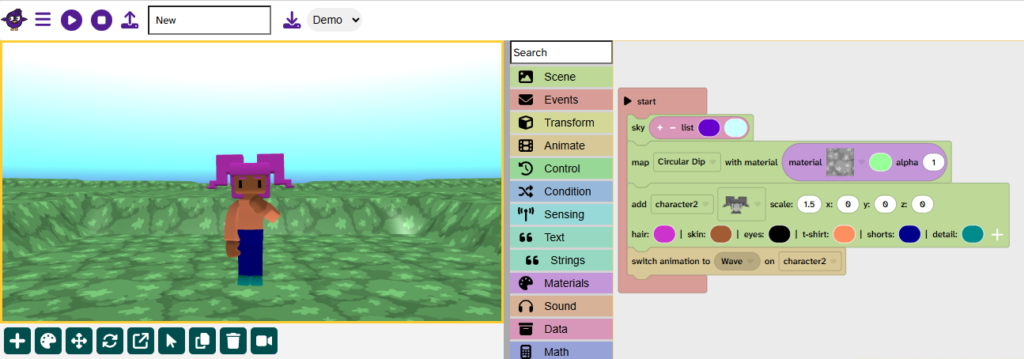
Animate a character
Press T then A to access the Animate menu
Press → to highlight the switch animation block, press Enter to add to the code area.
Use ↑, ↓, ←, and → to place the block under the character block.
Press Enter to confirm.
Press → on the switch animation block to reach the animation menu. Press Enter to open.
Choose an animation and press Enter to confirm.
Press P to play the animation
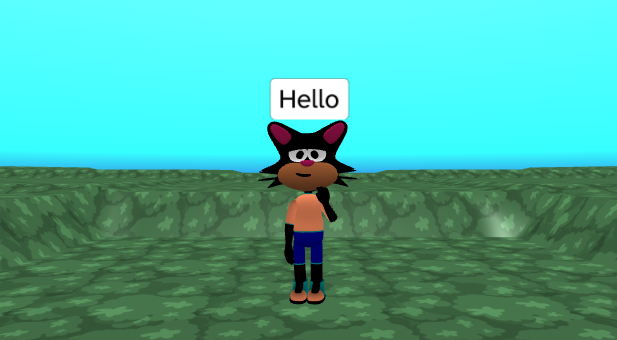
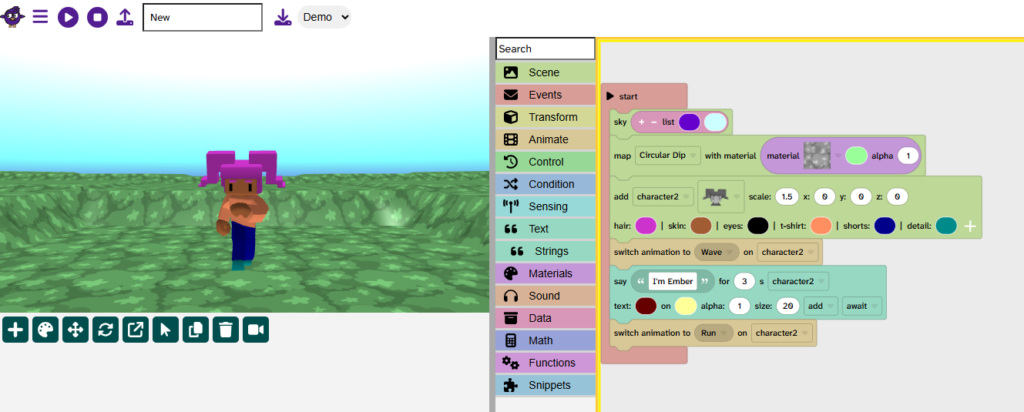
Use the say block
Press T then use the ↓ to access the Text menu
Press → then ↓ to reach the say block. Press Enter to add to the code area.
Use ↑, ↓, ←, and → to place the block under the switch animation block.
Press Enter to confirm.
Press → twice to access the text area and press Enter to enter new text e.g. “I’m Ember”.
Press Enter to confirm text.
Press → several times to reach the text colour and choose a colour, press → again to choose a background colour for the text.
Press → until you reach start. Press Enter and change to await. Press Enter to confirm.
Press P to play.

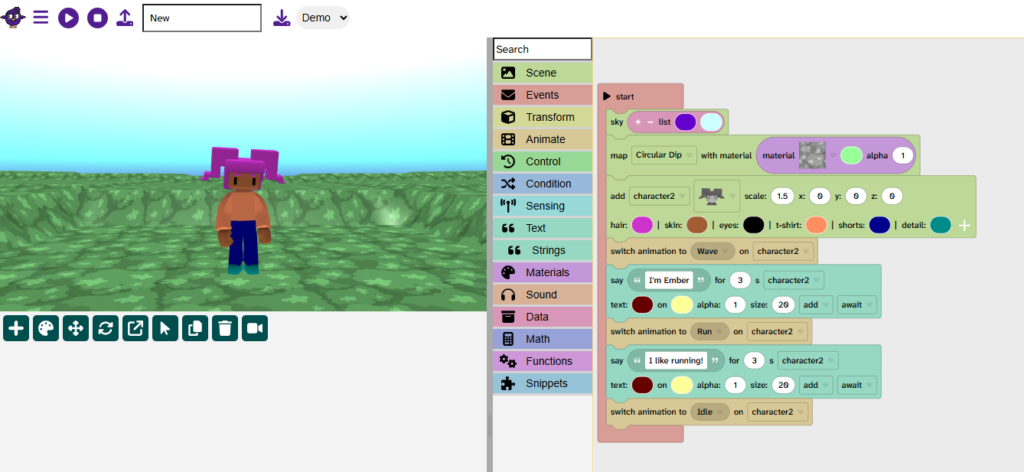
Duplicate blocks
Access the code area by holding Ctrl + B and pressing 8
Use ↑, ↓, ←, and → to navigate to the switch animation block
Press D to duplicate the block
Press M to place the block into move mode
Press ↓ until the block is under the say block. Press Enter to confirm.
Press → and Enter on the switch animation block to choose a new animation.
Press P to play
Continue the animation sequence
Continue to duplicate blocks to build an animation sequence
You could:
➡️ Create a karaoke version of your favourite song
➡️ Write a poem
➡️ Tell a joke
➡️ Teach something new
➡️ Or something else!
End an animation sequence with an ‘Idle’ animation to make it feel like it has ended.
Save your project
Hold Ctrl + S to save your project
Related articles
👉 How to use keyboard controls to navigate the Flock XR interface